Roads are constantly being expanded, maintained, and adapted to ensure their functionality. You’ve likely seen someone working on the streets recently, but have you ever wondered what the process of paving roads is?
There are five critical steps in paving roads. The steps are as follows: planning, design, earthwork, paving, and finally opening. All major public roads will follow these steps to ensure new roads are built up to scratch.
Keep reading to learn more about the process of paving roads. We will explore each step along the way, from the idea of a new road to the grand opening and everything in between.
Step 1: The Planning Stage
The initial step in repaving an existing road or building a new one is planning. There are many factors to consider when planning a route, and failure to plan effectively can lead to the road quickly deteriorating after initial installation.
Traffic volumes are a significant aspect of planning for a new road. If the road has heavy vehicles like trucks passing over every day, the road will require substantial and durable materials. Similarly, if the road has low traffic volumes, paying lots of money for durable building materials may be unnecessary.
Another critical aspect of planning a new paving project is the condition of the existing roads and bridges. If the plan is to have a route that crosses a bridge, the bridge must be inspected to ensure that it can withstand the weight of the new road and the construction process.
Safety is always of paramount importance when planning roads. Crash statistics are analyzed for the streets to decide whether new safety features are required, such as roundabouts, stop signs, and speed bumps.
Environmental factors also need to be assessed by experts before construction can get underway. Roads and overpasses can affect wildlife and disrupt their ability to move freely. Also, in some instances, asphalt roads have caused harm to waterways nearby. Therefore the local ecosystem must be assessed before construction.
Once these factors have been considered, the local authorities building the road will need to allocate appropriate funding for the project. The costs of paving new roads vary significantly depending on location, labor, and material expenses.
Step 2: Designing the Road & Route
The next step involved in paving roads is designing the road and the route it will take. The planning step outlines what the traffic demands, safety features, and budget are for the new roadway. The next step is to survey the land and assess the location of the new project.
Here are a few vital factors to consider while designing the road:
- Terrain
- Water management
- Possible future developments in the area
- Disruption to wildlife in nearby communities
Once all of the factors have been considered, the search for a contractor can begin. Usually, the contract will be awarded to the lowest bidder. However, different authorities place different priorities on paving roads.
Step 3: The Earthwork
After a contractor has been hired and the planning and designing have concluded, it’s time to break ground on the project. However, before the paving can begin, the earthwork must be completed.
Earthwork refers to preparing the ground beneath the road to ensure that it’s ready for a road to be paved on top of it.
Earthwork is essential in ensuring that a quality and even road is produced. On top of this, effective earthwork will increase the longevity and durability of the road surface. If the ground underneath the road is not appropriately treated, the road will require regular maintenance and repairs and may even be prone to flooding.
Demolition and Removal
If the new paving project is taking place over an existing piece of road, the old road will need to be demolished and removed. If the existing road is made from asphalt, the old materials can be recycled and used again.
Depending on what materials were used for the old road, the process of demolition and removal can be quick and easy or challenging and time-consuming. Concrete roads are challenging to remove due to the strength and weight of the materials used.
If a new road is being built, the land will first need to be cleared. Land clearing will remove any trees, shrubs, and bushes that are in the way of the process. Land clearing will also remove large boulders and any other obstacles in the path.
Grading and Sloping
Once the space has been cleared for the new road, the land will need to be graded and sloped. Grading and sloping the ground is an essential step in water management. Effective water management is crucial when paving asphalt.
Poor water management has a devastating effect on asphalt. Standing water seeps through the asphalt into the foundations underneath. As a result, the foundations weaken and become unstable. This disrupts the road’s surface, which results in bumps, dips, and potholes appearing in the asphalt.
Therefore effective grading is vital in preventing damages to the new road. Grading and sloping will keep the water away from the road, which results in a durable and solid new road surface.
Sub Base Preparation
The sub-base of an asphalt road is the most important aspect, especially for longevity and durability. The sub-base provides the road surface with a stable platform. The sub-base also provides the road with protection against wear and tear.
The sub-base acts as a frost barrier beneath the asphalt. This prevents water trapped inside the asphalt from freezing in cold climates. As water freezes into ice, it expands in size. This breaks up asphalt roads, leading to cracks and potholes.
Different locations feature different sub-bases. In colder places, the sub-base will have to be installed up to half of the freeze depth. The freeze depth is the depth below the surface that ground soil is expected to freeze. The freeze depth varies significantly depending on the climate.
Dealer sub-bases are required in colder climates as the freeze depth is lower beneath the ground. The sub-base prevents the frozen water from damaging the asphalt above.
In other climates, the sub-base may require more base stability if the ground underneath the road is soft. The sub-base will also need to be compacted down. When sub-bases have not been compacted effectively, they can function poorly, quickly deteriorating the asphalt road surface.
Once the sub-base has been installed and compacted, it will be rolled over by heavy machinery. If the base moves or dips significantly, it is not strong enough. The contractors will then have to repair the damages and faults in the sub-base before paving the new asphalt road.
Any imperfections found in the sub-base before paving has begun will only get worse over time. Therefore a stable and robust sub-base must be established before beginning paving.
Step 4: Paving the Road
Now that the surface beneath the road has been adequately prepared with a compact sub-base and effective water management, it’s time to start installing the top layers of the road.
Depending on what material the road will be made of, there is a different paving process. The two most popular materials used in road construction are asphalt and concrete. Here are the steps involved in installing each.
Asphalt Paving
The first step in installing asphalt is adding the binder. The binder is a large aggregate either with oil, producing a durable material. This binder is what holds the asphalt together. The binder is effectively the glue holding the asphalt road together.
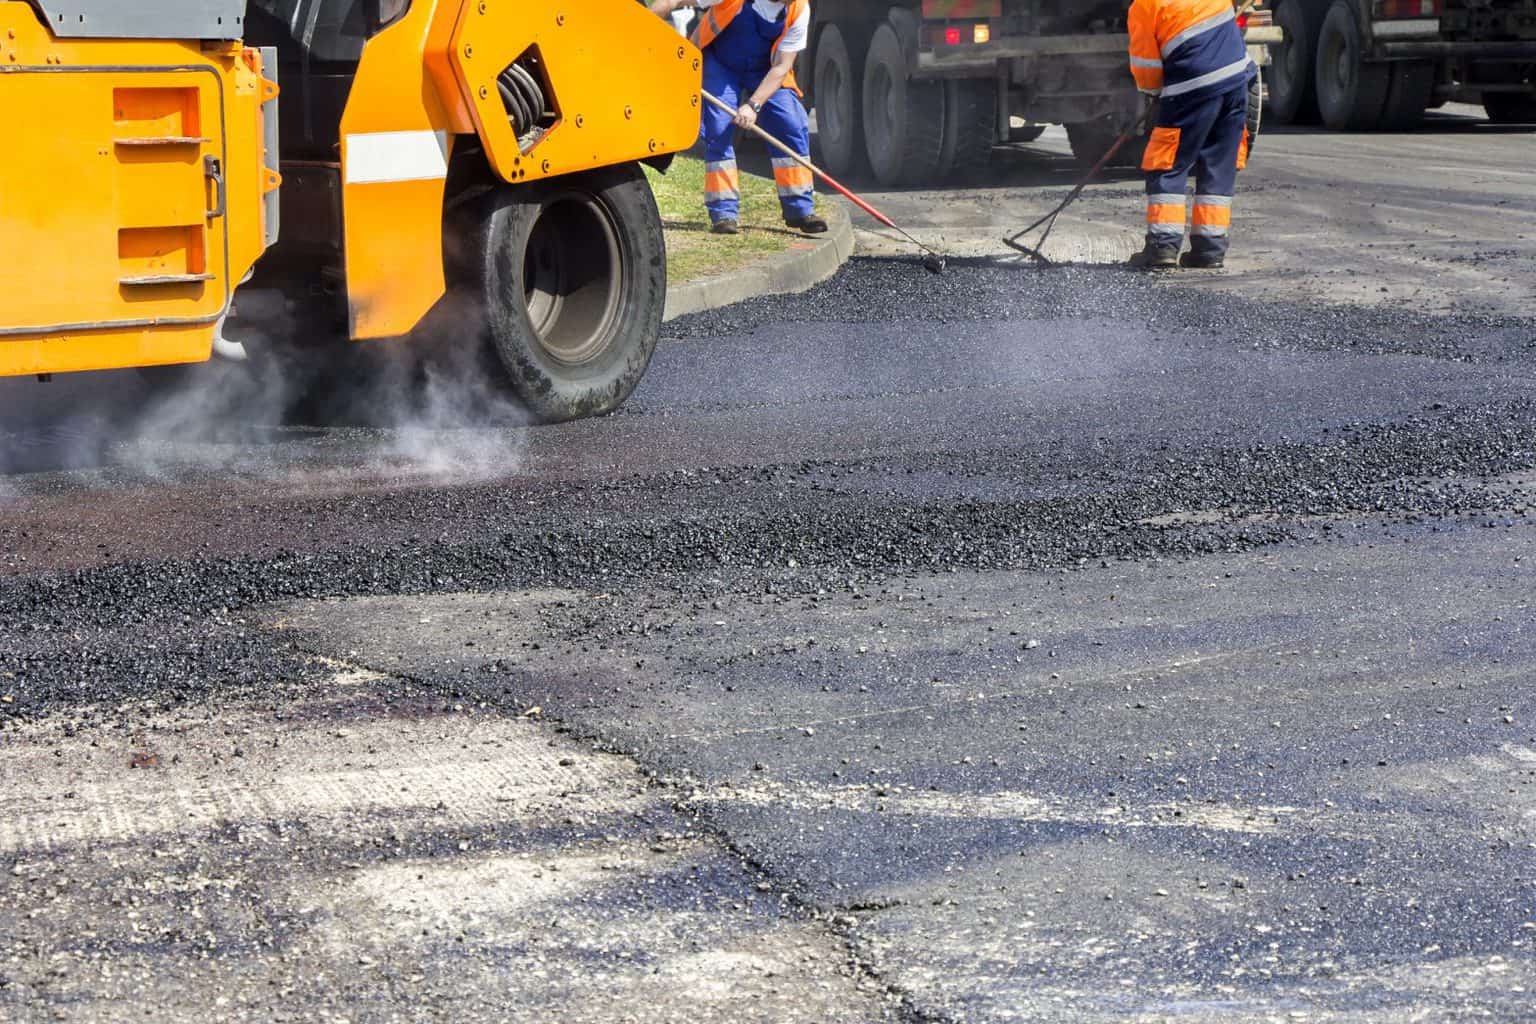
Asphalt is heated to over 300 degrees during production. The asphalt is then transported to the road site and poured onto the surface. Here the contractors evenly spread the asphalt to cover the road. After the asphalt has been distributed evenly, it gets compacted, usually using heavy machinery like steam rollers.
This forces the asphalt together, resulting in a durable road surface. Once the asphalt has cooled down, and the finishing touches have been applied, the road is ready to support the weight of heavy traffic.
Concrete Installation
The installation of concrete is more expensive and time-consuming than paving asphalt. This is a significant drawback to concrete roads’ popularity as they are more costly to install. Nevertheless, here are the steps involved in installing concrete roads.
Concrete is made from cement, water, and sand. It forms a solid material that can withstand enormous amounts of compression. However, concrete has poor tensile strength. As a result, concrete can’t be crushed, but it can easily be pulled apart. To prevent this from happening to concrete roads, steel cages or rebar are added to bind the concrete road together.
Concrete is poured into steel molds known as forms. The concrete is then vibrated using machinery. This settles the concrete down and removes any air from inside the mixture. Joints are cut within the concrete slabs to prevent cracks.
The gaps between slabs of concrete allow the material to expand and contract when temperatures change. The slabs can shift from side to side with changing temperatures, but they can’t move up or down as they are held in place by dowels. The finished product is a solid and durable road that can last for decades with little care or maintenance.
Joints and Transitions to Other Roads and Pavements
After the new asphalt or concrete surface has been installed, the latest piece of road will now need to be joined to other nearby existing roads and pavement. There is almost always a parking lot, driveway, or existing road that meets the new road somewhere.
The contractors must level the asphalt or concrete to ensure a seamless transition from the new roadway to connecting routes. Butt joints are where roads in poor condition meet with the new road. These areas require special attention as potholes are common in old roads.
Water management is also an important aspect when joining existing roadways to freshly baked concrete or asphalt. If water collects at the joints, the new road will be vulnerable to damages, primarily if the new highway is constructed using asphalt.
Once the joints and transitions are completed, it’s time for the final tests and finishing touches for the new road before opening to the public.
Step 5: Testing and Opening the Road
Before the road can open to the public, it must first be tested to examine its safety and effectiveness. The smoothness of the road is often inspected using seismology equipment. Seismology equipment is used to measure earthquakes. The seismology equipment is carried in a vehicle that passes over the new road to measure the vibrations.
If the vibrations are too rough, the contractors must grind down the road to provide a smoother finish. Severe road vibrations can cause damages to vehicles over time, and it’s also unpleasant to drive on for extended periods.
Once the road is sufficiently smooth, the water management will be examined with a drainage test. This will show if the water that falls on the road stays in place and causes damage or is effectively carried away. If the road fails the drainage test, adjustments and repairs will be made before opening the road.
Additional grading and landscaping work may be undertaken around the new road or connecting pavements for aesthetic purposes and to allow for adequate water drainage.
Finally, the last step in paving a new road is to add road markings. Road markings are permanently applied and include all road markings from the centerline to bus stops. Once the road marking has dried, and all inspections passed, the freshly paved road is now ready to open.
Final Thoughts
Paving roads consists of 5 key steps to bring the road from a plan to reality regardless of whether the road is built from concrete or asphalt.
Here are the five stages involved in paving roads :
- Planning
- Design
- Earthwork
- Paving
- Opening
Once these five steps are completed, a new road can “open for business.” The time it takes to complete the five-step process, however, can vary depending on the size of the road, any problems the team runs into, and several other factors.